Plan indoor seed starting around the space your seedlings will need before they leave the house, not just the space a packet of seeds occupies today. Your usable capacity includes light coverage, growing containers, access and a workable route outdoors.
Begin with the number of plants your garden can use and work backward. You can always grow a smaller, well-supported group instead of crowding every variety into a setup that only fits during germination.
Keep this as a space-and-schedule plan rather than a universal seed-starting recipe. The actual crop, equipment and growing medium still need their own instructions.
Start with the outdoor destination
Sketch the beds or containers where the plants will eventually go. Use crop and variety spacing guidance to estimate how many transplants you can actually place, leaving your normal access routes intact.
Make separate columns for plants needed, plants you intend to start and any specific backup allowance you choose. Do not let the number of seeds in a packet quietly become the number of plants you must accommodate indoors.
If you are sharing plants with someone else, agree on the number and handoff period before counting their garden as your overflow space. Until the plants leave, they still require room and care in your setup.
Check whether starting indoors is appropriate for the crop at all. A planting that is better direct-sown should not take up your limited indoor space merely because an empty tray is available.
Work backward from a suitable planting window
Choose a locally appropriate outdoor target, then use the exact crop’s instructions to determine the indoor interval. Keep time for gradual outdoor acclimation in the plan rather than moving the plants directly from a shelf to an exposed bed.
Maryland Extension relates seed-starting time to the crop’s planting date, germination speed and transplant growth. Its discussion is a reason to build separate schedules for different crops instead of sowing the entire seed collection on one convenient weekend.
Label each batch with its crop, variety and intended outdoor window. Two trays sown on the same day may need different care and may leave the house at different times.
Leave a line for a delayed outdoor move. A calendar cannot guarantee suitable weather, so make sure you know where the plants can remain if the bed is unavailable when you expected to use it.
Measure a usable growing location
Measure the shelf or table, then mark the area you can actually use while preserving access. A full tabletop is not all growing space if you still need a place to set down a tray while watering.
Minnesota Extension recommends a suitable location away from heavy traffic, pets, drafts and excess heat. It also asks you to allow for later sowings and seedlings moving into larger containers.
Consider what an ordinary care visit will look like. You should be able to inspect plants at the back, remove a tray and deal with a small spill without rearranging the entire room.
Use equipment intended for the setting and follow its electrical and mounting instructions. A sketch of available space is not an engineered shelf design or permission to improvise supports around water and powered fixtures.

Count the adequately lit area
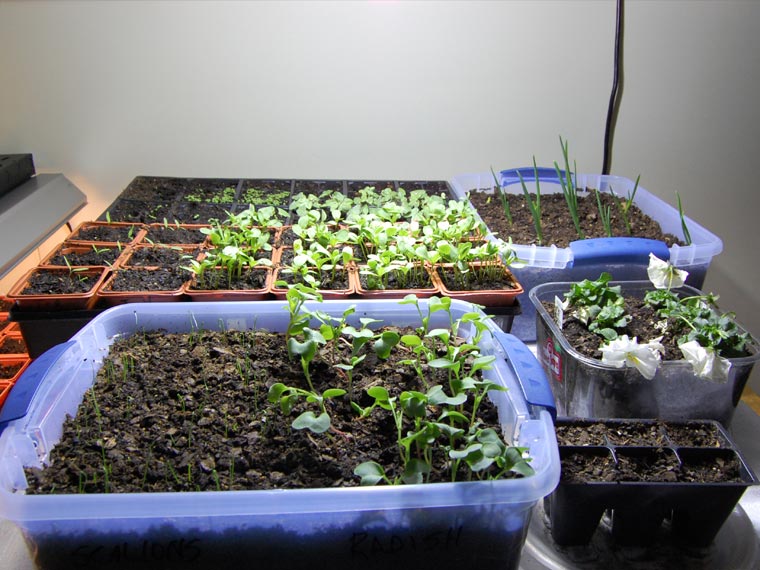
Do not treat every visible part of a shelf as equal light coverage. Use the fixture manufacturer’s specifications and mounting instructions to establish the growing area and appropriate placement for your equipment.
Maryland explains that ordinary window light is seldom enough for sturdy seedling growth, while suitable artificial lighting can support indoor transplants. A bright-looking room therefore should not substitute for evaluating the actual light arrangement.
Keep fixture length, illuminated area and shelf dimensions as separate entries. A lamp that physically fits above a shelf has not automatically established that every container on that shelf receives suitable light.
If a seller’s description does not explain the intended coverage and operating arrangement, resolve the question before you buy additional trays. More containers will not correct a lighting plan that already has an unsupported assumption.
Plan the larger-container stage
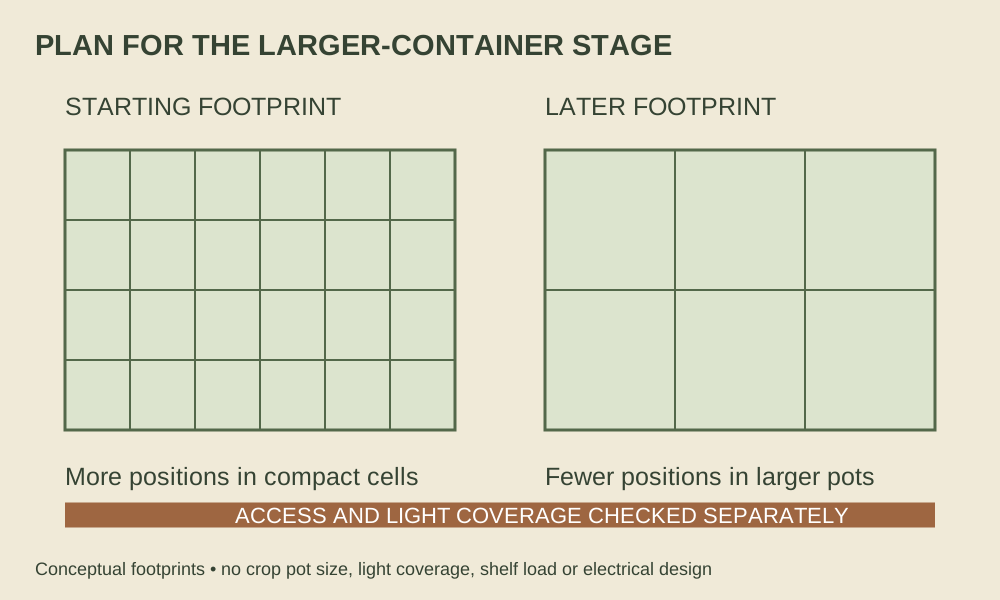
Make two layouts: one for the original sowing containers and one for the plants later in their indoor stay. The second drawing is often the one that reveals your real capacity.
Rutgers’ seed-starting guidance discusses containers, care and the transition to larger growing space. Use the crop’s actual growth and handling requirements rather than assuming it can stay in its initial cell until the outdoor date arrives.
For an original arithmetic example, suppose a rectangular usable area measures twenty-four by sixteen inches and a later container footprint is six by four inches. Four footprints fit across and four along in an idealized grid, giving sixteen positions before any extra clearance or equipment is included.
That count is a geometry illustration, not a light specification or a recommended container size. Measure actual rims, carrier trays, access and the equipment arrangement before using a similar calculation for your setup.
Leave room for the care routine
Identify where water will come from, where excess water can be handled and where you will set down each container while checking it. Keep the plan compatible with the actual tray and growing-container directions.
Place labels where you can read them without moving plants repeatedly. A batch name attached only to a loose tray can become confusing if you later divide its containers across two shelves.
Think through a normal busy morning before increasing the number of batches. If care depends on a long sequence of rearranging fixtures and carrying dripping trays through the house, simplify the arrangement.
A smaller count can also make it easier to observe differences between batches. You are more likely to notice a specific problem when every tray has an accessible place and an identifiable purpose.
Buy for the bottleneck you actually found
Before buying another tray, identify what limits your present plan. The problem might be later-container space, insufficient verified light coverage, an awkward care route or a schedule with too many overlapping batches; each calls for a different change.
For example, a second tray does not help if your only growing area is already occupied by plants that need larger pots. Reducing one batch or obtaining some transplants later may address that conflict more directly than adding another piece of equipment without a place to use it.
Compare the complete setup cost when you do choose an expansion, including compatible carriers, lighting and any support the equipment requires. Keep prices and assumptions in your own dated shopping note, since a general planning article cannot promise what a particular supplier will charge when you order.
Keep the final equipment list beside the busiest-week drawing. If you change a container size or add a fixture, update both documents before ordering, so a small shopping substitution does not quietly invalidate the space you already counted.
Check the busiest week, not the first week
Draw a simple week-by-week occupancy list for each growing area. Add the batch when it enters, change its space when it moves into larger containers and remove it only when it actually leaves.
Include any overlap between an older batch waiting for outdoor conditions and a newer sowing that is already scheduled. That overlap is easy to overlook when you plan each crop on a separate page.
If the busiest week exceeds the usable growing area, reduce quantities, change the schedule where crop guidance permits or obtain suitable transplants later. Do not solve the problem by silently placing plants beyond the verified light arrangement.
Your completed indoor plan should connect an outdoor destination, a crop-specific calendar and enough usable space at each stage. That gives you a manageable beginning for the garden instead of a temporary tray display that outgrows its home.