Harden off seedlings by gradually introducing them to suitable outdoor light, wind and temperature conditions while you watch the actual plants and forecast. The process is a transition, not a contest to see how much stress a small transplant can survive.
Plan it before the intended planting day and identify a sheltered place you can reach easily. You need a way to move the plants, check them and bring them back to an appropriate protected location when conditions call for it.
Keep the crop’s requirements attached to every decision. A cool-season transplant and a tender warm-season plant should not automatically follow the same exposure schedule.
Understand what is changing
Plants raised indoors or in a greenhouse have experienced a different environment from the open garden. Direct sun, moving air and changing temperatures can arrive together when you place a tray outside.
Utah State describes hardening off as incremental acclimation to the outdoor environment. It emphasizes that indoor-grown seedlings are not immediately suited to harsh outdoor conditions, even when they look ready to leave their pots.
Separate acclimation from the decision that a crop can be planted outdoors at all. A carefully transitioned tender plant still needs appropriate temperatures, a suitable bed and the correct seasonal window.
Likewise, do not confuse a larger plant with a hardened plant. Height or a crowded container tells you something about its current state, but it does not establish what outdoor conditions it has already experienced.
Identify the starting conditions
Write down whether your seedlings came from your indoor setup, a greenhouse or an outdoor sales area. If you bought them, ask what exposure they have actually had rather than assuming every retail transplant has completed the same transition.
Group plants by crop and current condition so that you can move and observe them without mixing up their histories. Keep labels with the containers, especially if you split one tray into different sheltered places.
Inspect the plants before beginning and note existing damage. That gives you a reference for later observations and prevents you from attributing an old leaf mark to the first afternoon outdoors.
If a plant already has an unexplained decline, investigate it separately. Increasing outdoor exposure is not a general treatment for a seedling that is struggling for an unknown reason.
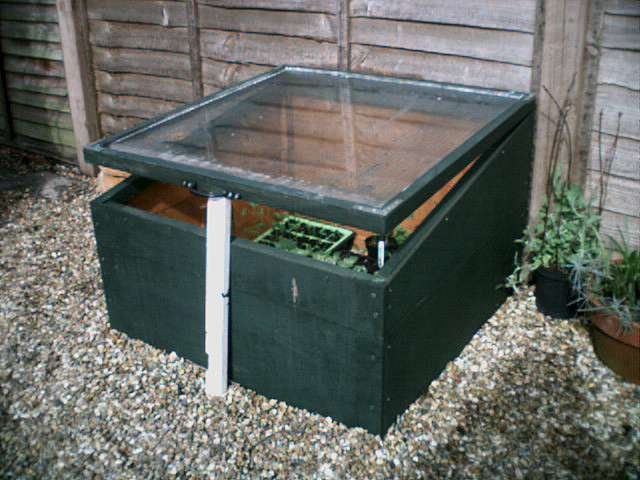
Choose a place for controlled exposure
Minnesota Extension begins its transition in shade protected from wind, then increases outdoor time and direct sun gradually. Its directions also bring plants back inside before temperatures drop at night during the early stage.
Choose a stable location that remains accessible without blocking a doorway or path. Check how the sun moves through it, since a place shaded when you leave for work may be fully exposed later in the day.
Trace the route between the indoor growing area and the protected outdoor spot. You should be able to carry the actual containers securely, with the plants supported, rather than balancing several loose pots on an inadequate tray.
If other people use the area, explain where the plants belong and which batches need to come back in. A move made for convenience can change the exposure you thought you were providing.

Read the conditions before each move
Check the forecast and the crop’s relevant temperature guidance before taking the plants outside. A date in an acclimation schedule does not cancel a predicted freeze or make an unsuitable night acceptable.
Utah State cautions against freezing exposure and temperatures unsuitable for tender warm-season plants. It also notes that excessive cold can create problems for hardy or semi-hardy seedlings, so the word hardy should not become permission for arbitrary cold treatment.
Keep light, wind and temperature visible as separate conditions in your notes. If yesterday was calm and shaded, a windy sunny afternoon is a larger change than an identical number of hours would suggest.
When conditions are unsuitable, revise the day’s action. You can pause a transition while maintaining appropriate care instead of forcing the plants outdoors simply to preserve an unbroken streak of scheduled days.
Increase exposure with observation
Use the actual crop guidance as your starting method, then observe each batch as exposure increases. Minnesota and Utah State both describe gradual increases rather than an immediate move from indoor protection to a full day in an exposed garden.
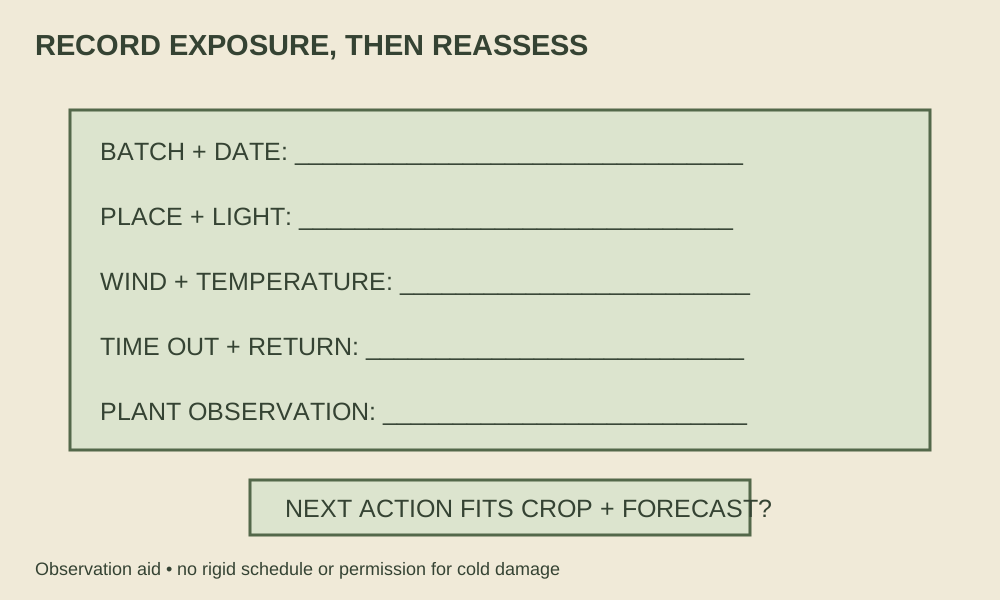
Record the place, approximate time out, weather conditions and what you noticed afterward. A short entry is enough if it lets you compare the same batch from one visit to the next.
Do not respond to every change by immediately adding more sun or time. If the plants show concerning damage or decline, reassess the conditions and seek help with the actual history instead of treating visible stress as proof that the process is working.
Also avoid assuming every older leaf must remain perfect. Utah State explains that new growth suited to outdoor conditions is part of the transition, but that context does not diagnose an unknown symptom or justify ignoring a deteriorating plant.
Keep ordinary care in the plan
Check the growing medium and maintain appropriate moisture during the transition. Outdoor exposure changes the conditions around a small container, so do not assume its indoor watering routine automatically remains suitable.
Keep watering decisions separate from a plan to toughen plants by neglect. Rutgers’ seed-starting guidance treats the transition as managed exposure, and any change in care should stay within instructions appropriate to the actual crop.
Do not add an improvised fertilizer or chemical treatment because you want the process to move faster. If you are using a labeled product in normal care, follow its actual directions rather than combining it with an unrelated acclimation shortcut.
Keep the return location ready as well. A sheltered spot is useful only if it remains available when weather changes, rather than becoming occupied by another batch or household project halfway through the transition.
Make a simple handoff note for a helper
If someone else will move the plants while you are away, leave instructions for the actual day and batch. Identify the protected location, the conditions that would change the plan and where the plants should return, rather than leaving a generic request to put the seedlings outside.
Ask the helper to record what happened if the plan changes. An afternoon that stayed indoors because of weather should remain part of the history, not become an assumed full day of outdoor exposure in your next decision.
Keep emergency contact arrangements and ordinary care information separate from the acclimation record. The point is to make a small, repeatable task understandable, so the plants do not receive two different sets of actions from people who each believe they are helping.
Check planting readiness as a separate decision
Before transplanting, revisit the crop, local window, forecast and bed conditions together. Completion of a gradual exposure plan does not override a delayed spring or a growing space that is still unavailable.
Have the planting area and routine after planting ready before you move the entire group out of its protected setup. You should know where each plant goes and how you will inspect it afterward.
If you delay, update your indoor and protected-space plan instead of leaving the plants in an improvised holding area. The transition can change your space requirements, so keep the seed-starting occupancy plan current.
Your useful endpoint is a batch gradually introduced to suitable outdoor conditions with a specific planting plan. Keep the observations and the weather decisions together so that next season’s approach starts from your actual experience rather than a rigid checklist detached from the garden.